Charging the headphones’ rechargeable battery
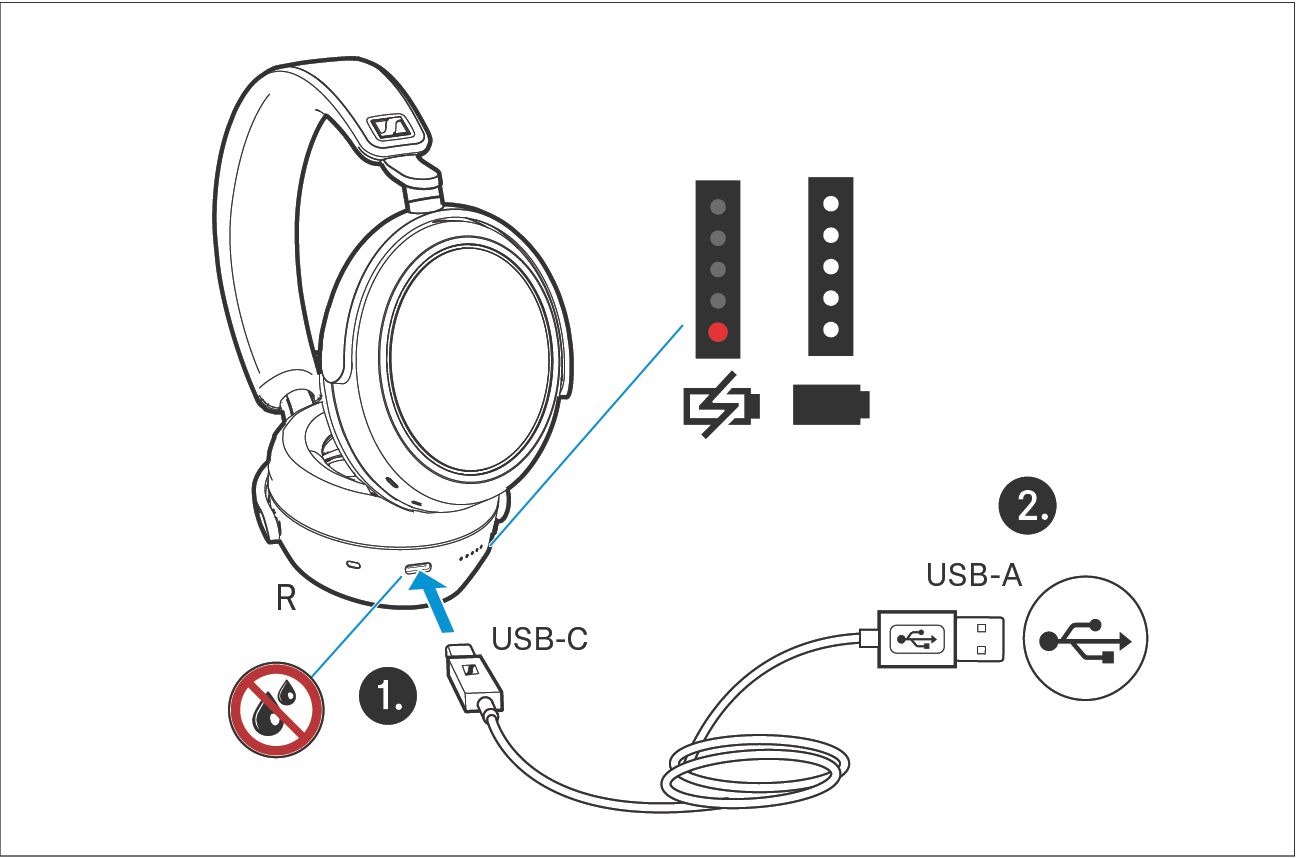
1.Make sure that the charging socket is free from moisture and contamination. Connect the USB-C connector of the charging cable to the USB socket of the headphones.
2.Connect the USB-A connector to a corresponding socket of a USB power source (to be ordered separately). Make sure that the USB power source is connected to the power supply system.
The charging process of the headphones begins. The LED display indicates the charge status.
LED | Meaning | |
|---|---|---|
| 1 red | Rechargeable battery is almost empty (less than 2% charged) |
1 white | Rechargeable battery is approx. 2-20% charged (>1 hour of playback time) | |
| 2 white | Rechargeable battery is approx. (>12 hours of playback time) |
| 3 white | Rechargeable battery is approx. (>24 hours of playback time) |
| 4 white | Rechargeable battery is approx. (>36 hours of playback time) |
| 5 white | Rechargeable battery is approx. (>48 hours of playback time) |
| 5 white | Rechargeable battery is 100% charged (up to 60 hours of playback time) |


If the LED display does not light up:
Clean the charging socket (> Care and maintenance).
Charge the rechargeable battery until the LED display lights up again (at least 30 minutes) (> Charging the headphones’ rechargeable battery). If the rechargeable battery is completely discharged, it may take several minutes for the LED display to indicate the charging process.
 | You can speed up the charging process by charging the headphones when they are switched off. |
| If you disconnect the USB connection during or after charging, you will hear a voice prompt informing you of the remaining battery life. |